

Start here
What You'll Need Before You Start
Next
Planning Your Tile Layout
Then
Choosing and Applying Adhesive
Almost there
Setting Tiles and Grouting
Finish strong
Common First-Timer Mistakes to Avoid
What You'll Need Before You Start
Good preparation separates a successful tile project from a frustrating one. Before buying a single tile, assess your subfloor. It must be clean, flat (within 3/16 of an inch over a 10-foot span), and structurally sound. Any flex, rot, or high spots will telegraph through your finished floor.
Gather these essential tools before you begin:
- Tape measure and chalk line — for layout and reference lines
- Notched trowel — for spreading adhesive evenly
- Tile spacers — to maintain consistent grout joint width
- Rubber mallet — to gently seat tiles without cracking them
- Tile cutter or wet saw — for cutting tiles to fit edges and corners
- Grout float — for pressing grout into joints
- Sponges and buckets — for cleanup
- Safety glasses and knee pads — protection during cutting and kneeling
If your project is part of a broader home renovation, it helps to think through your budget early. Our family budgeting guide can help you plan home improvement costs alongside your household finances.
Thin-set mortar
A cement-based adhesive mixed with water (and sometimes latex) that bonds tiles to floors or walls. It is stronger and more moisture-resistant than pre-mixed adhesives.
Subfloor
The structural layer of flooring beneath your finished surface — often plywood or concrete. It must be flat, solid, and clean before tiling.
Grout joint
The gap left between tiles that is later filled with grout. Joint width affects both appearance and structural performance.
Back-buttering
Spreading a thin layer of adhesive directly onto the back of a tile before pressing it down. Used for large tiles to ensure full contact with the subfloor.
Grout float
A flat, rubber-faced tool used to spread and press grout into the joints between tiles at an angle.
Cement backer board
A rigid, moisture-resistant panel installed over a wood subfloor before tiling to provide a stable, non-flexing surface.
Planning Your Tile Layout
How you plan the layout determines how professional the finished floor looks. Never start in a corner — corner tiles are almost always cut, and starting there means cut tiles will be prominently visible in the center of the room.
Instead, find the center point of the room by snapping chalk lines between the midpoints of opposite walls. Where the lines intersect is your starting point. Dry-lay a row of tiles out from that center point toward the walls to preview where cuts will fall. Aim for cut tiles at edges to be at least half a tile wide — narrow slivers look awkward and are harder to cut cleanly.
If the room is out of square (most rooms are, slightly), adjust your chalk-line grid to visually balance the layout rather than rigidly following the walls.
Use a Reference Line, Not the Wall
Walls in most homes are not perfectly straight or square, so tiling parallel to a wall often produces a visibly skewed floor. Always snap chalk reference lines from the room's center and tile to those lines instead. This small step makes a significant visual difference in the finished result.
Choosing and Applying Adhesive
For most floor tile projects, thin-set mortar is the correct adhesive. It bonds strongly, handles moisture well, and works with nearly all tile types. Pre-mixed mastic adhesives are convenient but not suitable for wet areas like bathrooms or anywhere tiles are larger than about 8 inches square.
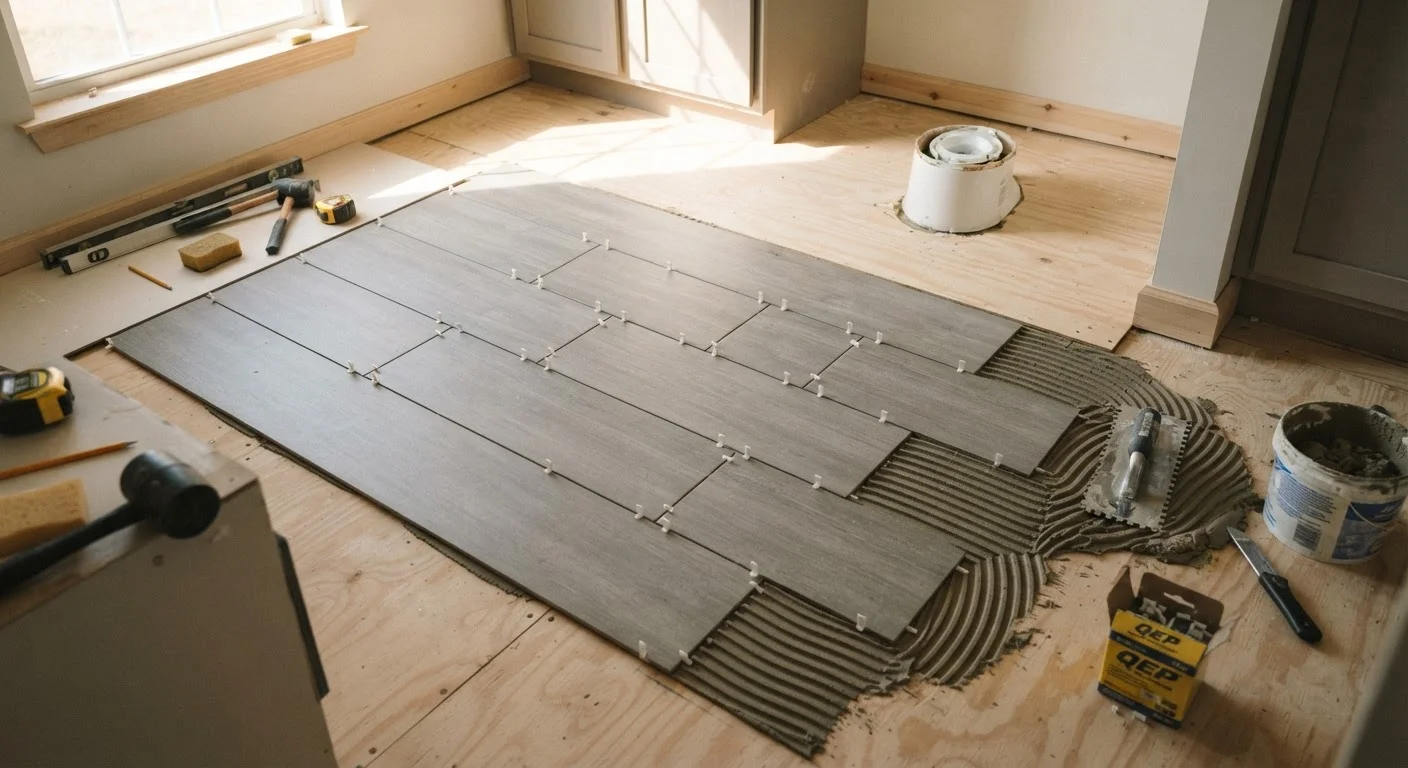
Mix thin-set to a smooth, peanut-butter-like consistency — it should hold a ridge without slumping. Using the notched trowel, spread adhesive over a manageable area (about 2–3 square feet at a time) using consistent strokes in one direction. This creates ridges that collapse evenly under the tile to maximize contact.
Back-butter large tiles (over 12 inches) by spreading a thin layer of thin-set on the tile back as well. This eliminates air pockets beneath the tile that can cause cracking over time.
Don't Let Adhesive Skin Over
Thin-set mortar begins forming a skin on its surface within 15–30 minutes depending on temperature and humidity. If a tile pressed into skinned adhesive won't bond fully, the tile can pop loose later. Work in small sections and check that adhesive is still tacky before setting each tile — if it isn't, scrape it off and apply fresh mortar.
Setting Tiles and Grouting
Press each tile firmly into the adhesive and give it a slight twist to bed it in. Use a rubber mallet and a flat block to gently tap tiles level with their neighbors. Insert tile spacers at each corner as you go. Check frequently with a straight edge or level — it is much easier to adjust a tile before the adhesive sets than after.
Allow thin-set to cure fully before grouting — refer to the product packaging for specific times, but 24 hours is a common minimum. Remove spacers before the adhesive hardens completely.
When mixing grout, aim for a smooth, lump-free consistency. Work in small sections, pressing grout diagonally across joints with a grout float to pack joints fully. Wipe away excess with a damp sponge before it hazes on the tile surface. After the grout cures (typically 48–72 hours), apply a grout sealer to protect against moisture and staining.
Common First-Timer Mistakes to Avoid
Even a well-prepared beginner can run into problems. Here are the pitfalls most likely to trip up a first tile installation:
- Skipping subfloor prep: Tiling over a soft, uneven, or dirty subfloor almost always leads to cracked or loose tiles within a year.
- Rushing cure times: Walking on tiles before the adhesive has cured — or grouting before thin-set is fully set — is the leading cause of tile failure for DIYers.
- Too little adhesive coverage: Aim for at least 80% coverage beneath each tile (95% in wet areas). Hollow spots cause tiles to crack under load.
- Inconsistent spacing: Uneven grout joints are visually distracting and difficult to fix after the adhesive cures. Use spacers consistently.
- Not sealing grout: Unsealed grout absorbs moisture and stains quickly, especially in kitchens and bathrooms.
Tiling rewards patience more than skill. Taking each stage methodically — and not cutting corners on drying time — is what separates a floor that lasts decades from one that fails in a season. Once you've built confidence on a small project, you'll find that the skills transfer well to other home improvement endeavors, much like the systematic approach described in our home organization beginner's guide.
Frequently Asked Questions
A small bathroom floor (under 50 square feet) typically takes a weekend for a first-timer when accounting for layout, setting, curing, and grouting. Allow 24–48 hours for thin-set to cure before grouting, and another 24–72 hours before walking on the floor after grouting.
It depends on what's underneath. You can tile over existing tile if it's firmly bonded and the surface is flat, but adding height can cause issues at doorways and transitions. Vinyl or laminate should generally be removed. Always confirm your subfloor is solid and level.
Adhesive (thin-set mortar) bonds the tile to the subfloor beneath each tile. Grout is a different material pressed into the joints between tiles after the adhesive has cured. They serve different structural roles and should not be substituted for each other.
Yes, but wood subfloors flex, which can crack tiles over time. The subfloor must be at least 1.5 inches thick and very rigid. Many installers add a layer of cement backer board over wood before tiling to create a stable, moisture-resistant surface.
Order 10–15% more tile than your measured square footage. This accounts for cuts, breakage during installation, and future repairs. Tiles from the same production run will match more closely, so buying extra upfront is smarter than sourcing replacements later.
Most unsanded and sanded cement-based grouts are porous and should be sealed after curing, typically 72 hours after grouting. Sealing protects against staining and moisture infiltration. Epoxy grout is non-porous and generally does not require sealing.
The content provided on our blog site traverses numerous categories, offering readers valuable and practical information. Readers can use the editorial team’s research and data to gain more insights into their topics of interest. However, they are requested not to treat the articles as conclusive. The website team cannot be held responsible for differences in data or inaccuracies found across other platforms. Please also note that the site might also miss out on various schemes and offers available that the readers may find more beneficial than the ones we cover.